
Connecting your Stripe account
Client payments go to your own Stripe balance, never through Crewty.
Crewty does not hold your clients' money. You connect your own Stripe account so every client charge lands in your balance and you stay in control of refunds, payouts, and disputes.
One time setup, about 10 minutes. Almost everyone who gets stuck does so for one of two reasons: they never left Stripe's sandbox, or they picked "registered business" without being registered. Both are covered below.
Step by step, with screenshots
-
1
Create your Stripe account
Go to dashboard.stripe.com/register and sign up with your email, or use Google.
Pick the country your business banks in. This cannot be changed later.
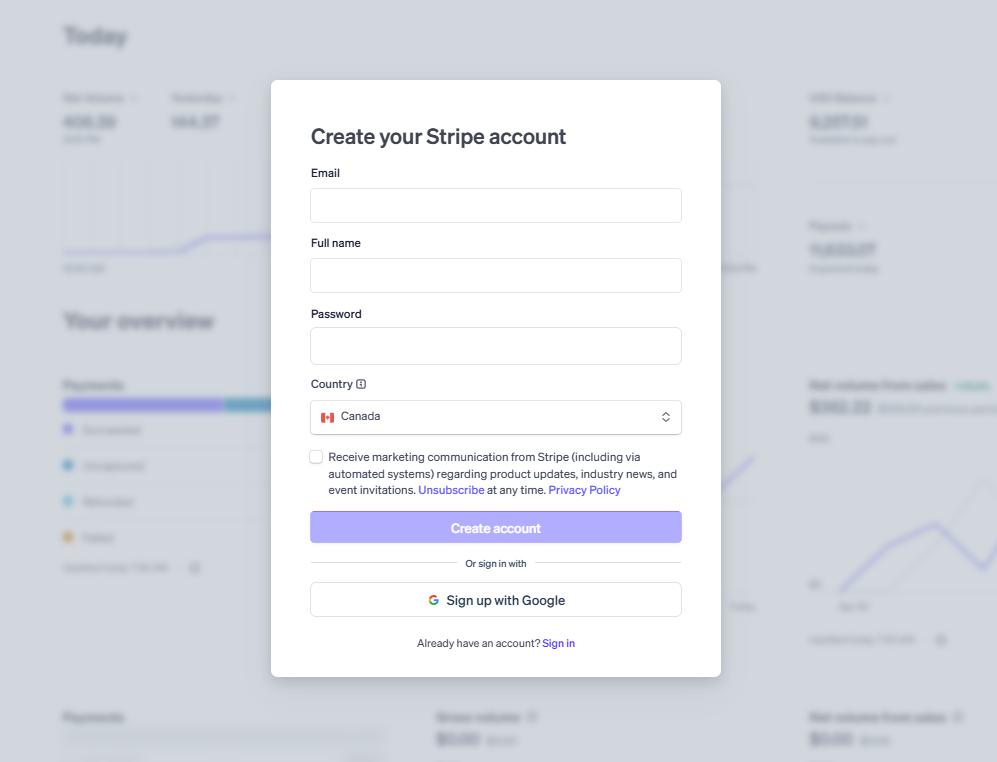
Choose the country your bank account is in. -
2
You will land in sandbox mode
New accounts start in a test sandbox. Nothing here takes real money.
Check by clicking your business name at the top left. If it says Test mode, you are in the sandbox.
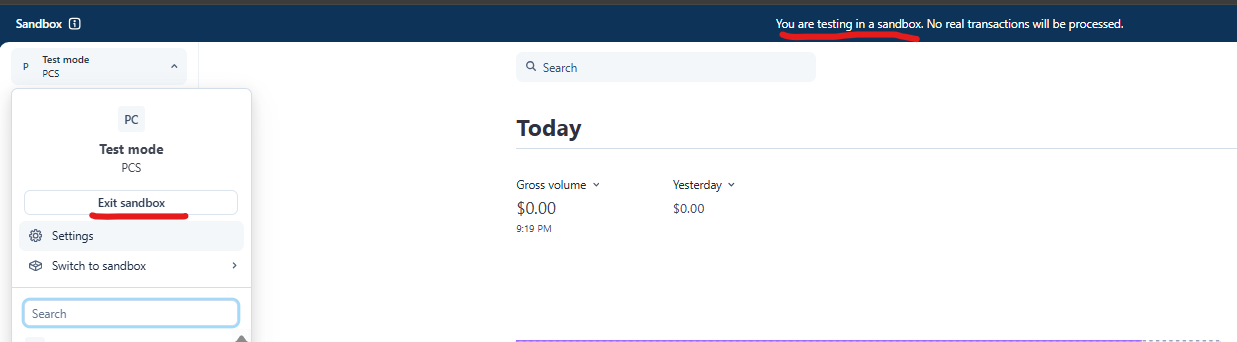
Sandbox: not live yet. 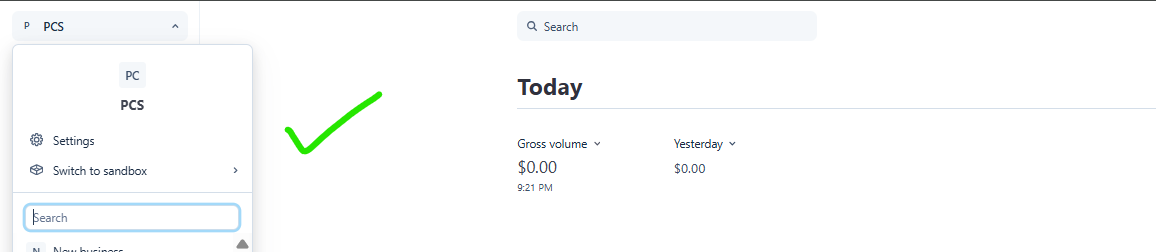
Live: no test banner. -
3
Before leaving sandbox, open the setup checklist
On the sandbox home page look for the Setup guide panel, or the Verify your business button in the top right.
This checklist is what turns the account live.
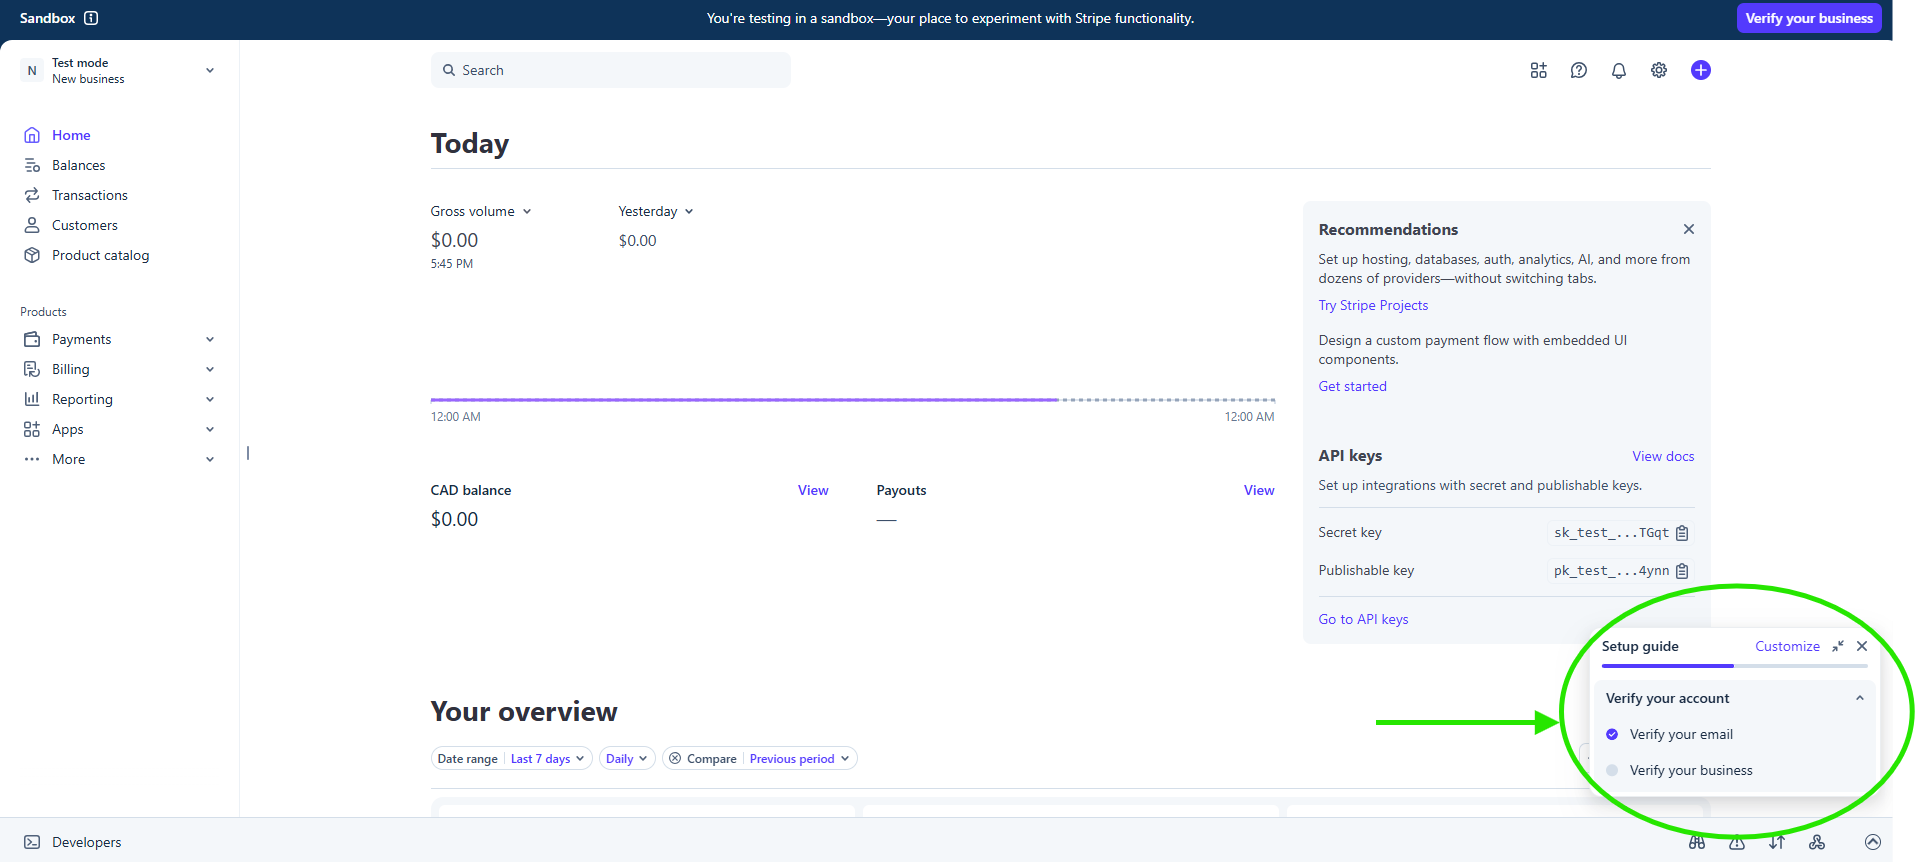
Find the checklist before switching out of sandbox. -
4
Choose your business type carefully
This is where most people go wrong. Only pick a registered business if you are actually registered with the government.
If you work under your own name with no registration, choose the individual or sole proprietor option. Picking wrong means Stripe asks for documents you do not have, and verification stalls.
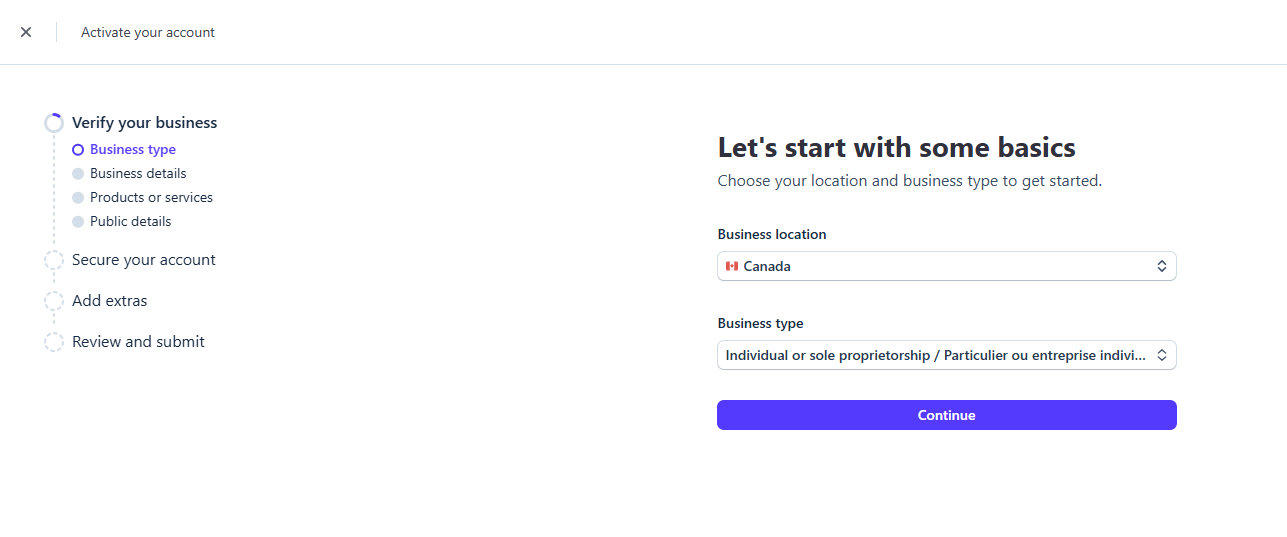
Canada: individual or sole proprietorship. 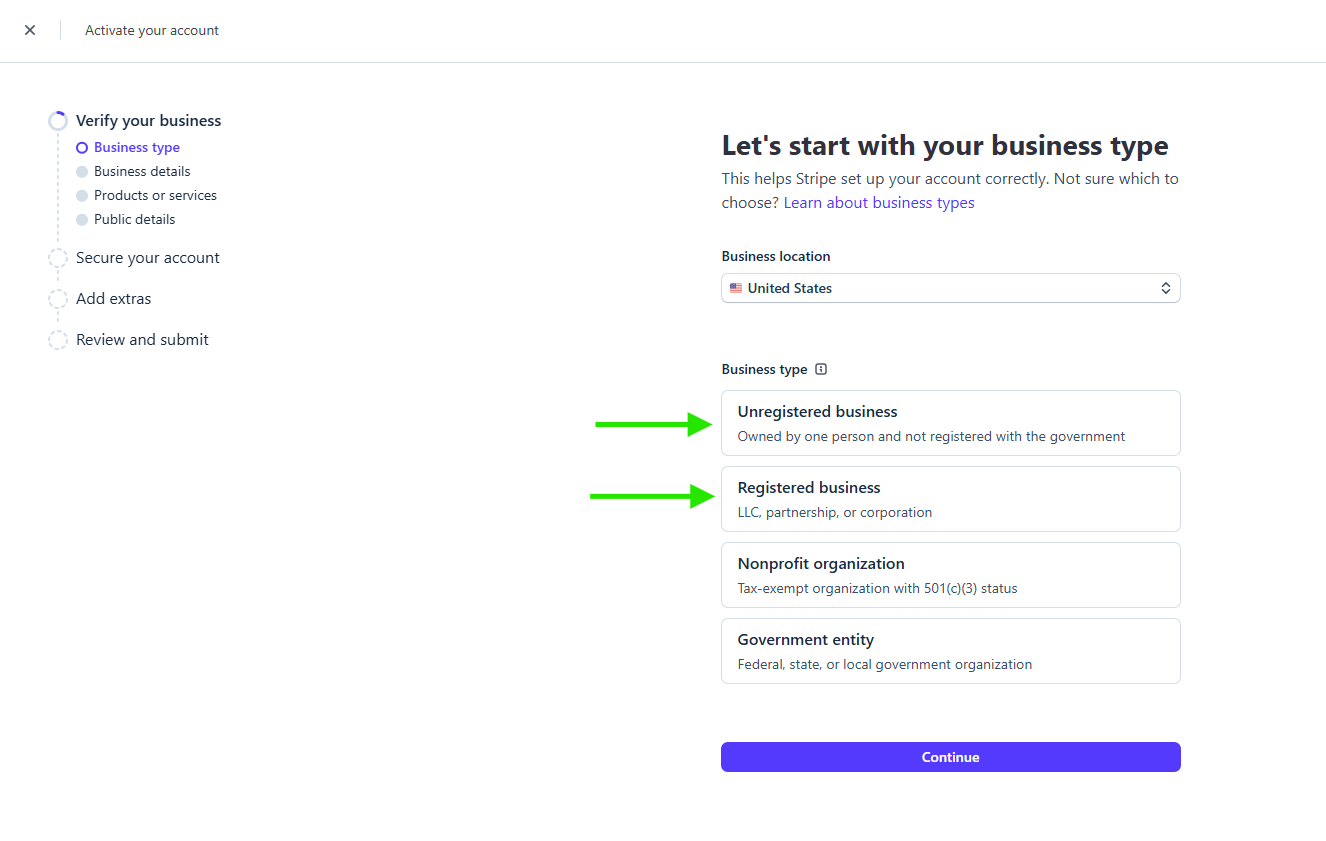
USA: unregistered unless you have an LLC. Not sure? If you have never filed registration paperwork, you are not registered. Choose the individual option.
-
5
Finish the form and add your bank account
Work through the rest of the checklist: business details, what you sell, and your public details.
Connect the bank account you want your money paid into.
-
6
Find your API keys
Once verification is done Stripe drops you into the real dashboard, out of sandbox.
Your keys are on the home page under API keys, or search API keys at the top.
Live keys start with
pk_live_andsk_live_. If yours saytest, you are still in the sandbox.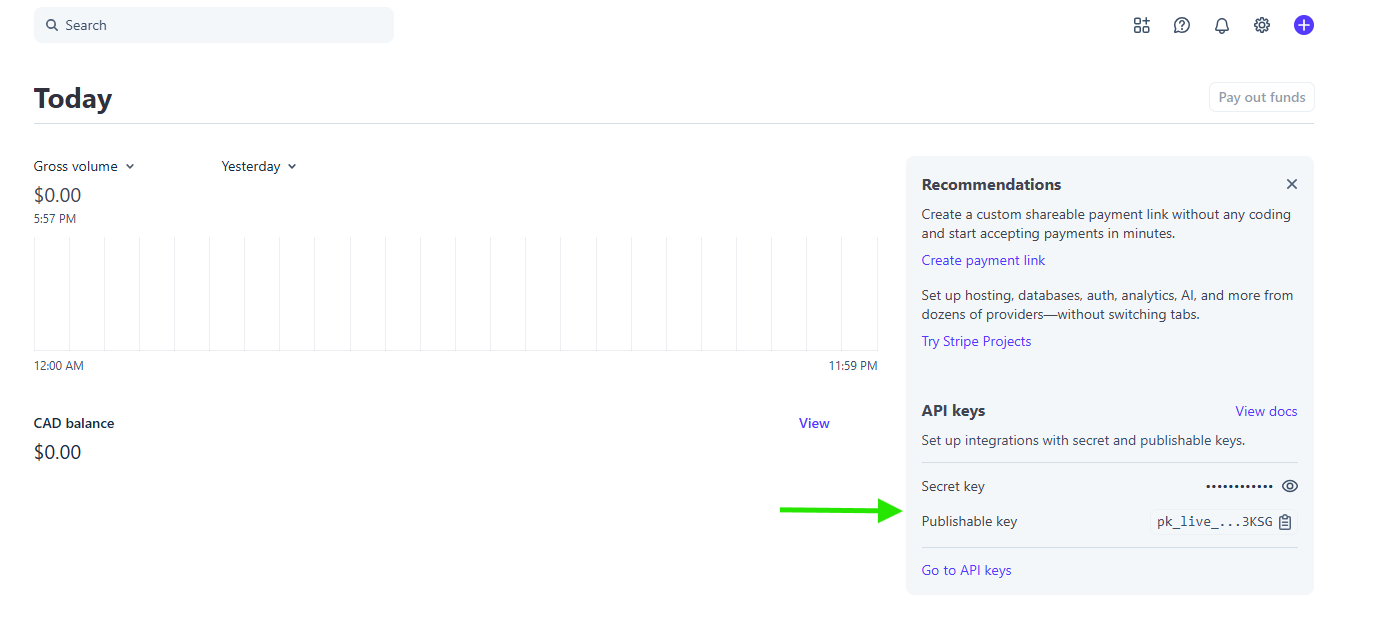
Publishable key is visible. The secret key needs revealing. -
7
Paste both keys into Crewty
In Crewty open Settings, then Payments. Click the eye icon in Stripe to reveal the secret key, then copy both keys into the fields and press Connect.
This is what lets Crewty charge your clients and pay your staff from your own Stripe balance. The money never passes through Crewty.
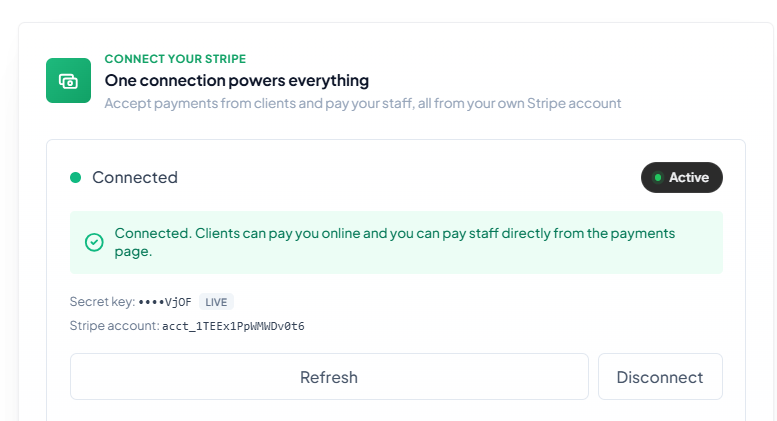
A green Active badge means it worked.
That is your Stripe account connected. You can now take payments from clients. To pay staff by bank transfer, carry on to setting up staff payouts.
Where your keys live
Your secret key is encrypted in Google Secret Manager, is never written to the app database, and is never shown again. Your publishable key is public by design, since Stripe puts it in every checkout page.
Keep your keys private. Only the owner should paste secret keys. If you rotate keys in Stripe, come back to this screen and paste the new ones. If you ever need to switch to a different Stripe account, use Disconnect first, then connect the new one.
What you can do once connected
- Send deposit and invoice payment links.
- Save client cards on file through Stripe Checkout.
- Charge cards for bookings and recurring work.
- Pay your staff straight from your own balance.
Stuck on a Stripe screen? Their support can walk you through it, or reach out to us and we will help.